Fitness, Lifestyle

Tips On Leaning Out

While I have made it clear in one of my previous posts that I am not really looking to necessarily lose weight, its no secret that I do want to lean out and have more definition in my arms, core and legs. My overall goal is to be more compact without out bulking up. I started seriously working on leaning out in December 2018 and have made a lot of progress recently. Here are a few tips I can pass along to those that have similar goals:

Eat Clean

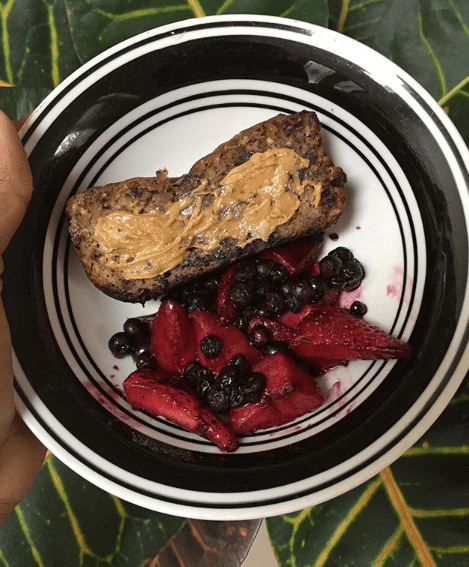
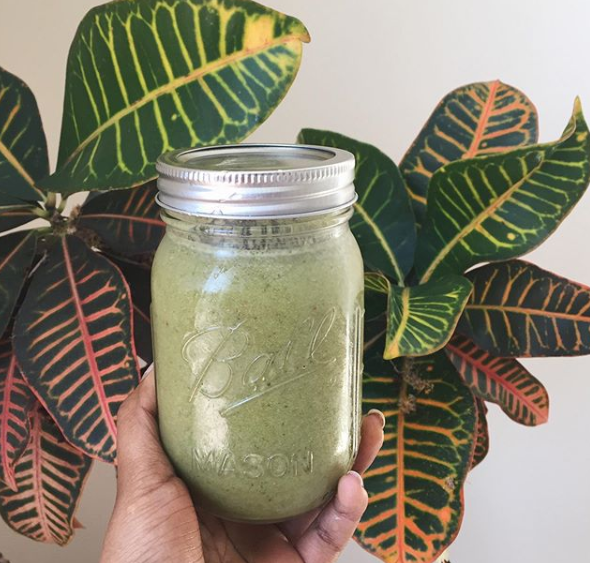
No matter what you do, you cannot out work a bad eating habits and it will be impossible to lean out while not following a balanced diet. I recommend eating whole foods (fruits, vegetables and protein from animal or plant sources) in place of processed foods high in salt or sugar. While I do not completely cut out carbs that come from wheat, rice and other grains, I do limit eating them to 1 time a day while I lean out. I will do a more detailed post on how I eat in the future but I typically eat a protein and 1-2 vegetables for dinner and eat my grains earlier in the day for breakfast or lunch.

Incorporate Cardio

I am aware that there is a lot of buzz on social media and in magazines that building muscle via weight lifting is the best way to lose fat. To some extent, I agree that’s a good strategy. However, losing fat is really about being in a calorie deficit — if you burn more calories than you eat, your body will burn fat for fuel. Cardio is simply the better way to get into calorie deficit in a shorter amount of time. It’s hard to burn 1,300 500+ calories, like I did during my 20 min HIIT workout today doing weights for the same amount of time. Even the amount your metabolism is boosted by having extra muscle is negligible when compared to these high amounts of calories burned by cardio. If you get injured easily running and moving around too rapidly, there are so many options. Cardio does not have to be stressful or high impact– you can do it passively by walking everyday.

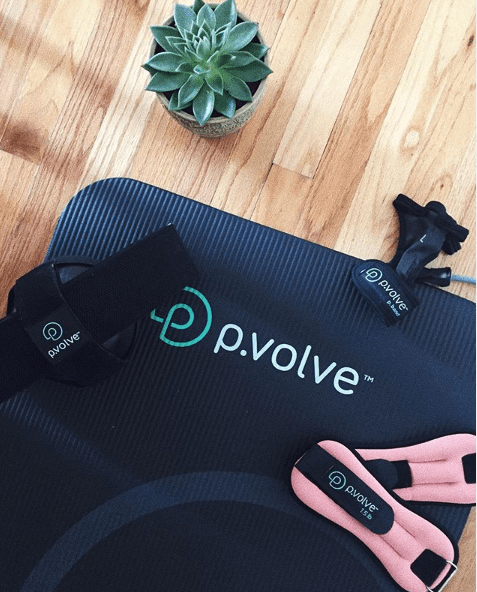
Incorporate Strength and Resistance Training

Although cardio is necessary for leaning out, strength and resistance training is necessary to define your physique and build muscle. Like cardio, there are so many options to chose from. You can lift traditional weights or use resistance equipment such as arm and ankle bands. I typically do resistance training like this 3-4 times a week via P.volve, which is a low impact program that that uses bands and smalls hand weights.

Try Pilates or Yoga

Not only is yoga relaxing, depending on how much you practice, yoga has the ability to increase fat loss, develop muscle tone, and build flexibility, leading to a more lean-looking physique. Pilates has a similar effect– though it is more strenuous and is considered a type of resistance training.

Optional – Fasted Workouts

Working out while fasted means that you exercise while you are on an empty stomach (please still drink water). Though there is a lot of controversy surrounding fasted workouts, I find that doing them a few times a week does help me lean out and burn more calories.

Required – Stay Consistent

Ultimately all of these tips will not really amount to much unless you are consistent. Truthfully though I started eating healthy years ago, I did not see results until I kept track of whether or not I was eating clean or doing enough physical activity. My suggestion is to keep a planner for your workouts and create a grocery list before you head to the store to buy your food.

There you have it! Four things that have helped me lean out in the past 9 months. Hope this helps!

Standard
Uncategorized

Easy Gluten-Free Blueberry Pancakes

Pancakes are a stable for breakfast that I used to love eating as a kid. Although I have cut down on eating the traditional version of pancakes made with flour, milk and butter, I eat a gluten-free version regularly that brings all the nostalgic memories back. Here’s how to make these pancakes:

Ingredients

  • 2 bananas
  • 2 eggs
  • 1/2 cup of gluten free oats
  • 1/2 cup of frozen blueberries
  • cinnamon

Directions

  1. Mash your bananas into a thick paste
  2. Add in the eggs, oats and cinnamon and whisk until smooth.
  3. Add in the blueberries and stir until they are distributed evenly throughout the batter.
  4. Heat a tablespoon or so of coconut oil in a non-stick skillet over medium-low heat. Cook for about 3 minutes, until set. You’ll want to make sure the heat isn’t too high so they don’t burn. Cook on the other side for another 30 seconds.
  5. Remove from the pan and top with maple syrup and your toppings of choice– I love peanut butter, coconut flakes and bananas on top of mine!
Standard
Uncategorized

7 Healthy Traveling Hacks

Vacations are usually relaxing and a great way to recenter yourself, but I find that the re-adjustment time after a trip is stressful because we fall out of our routines so much. To combat this issue, here is what I have been doing while traveling so that coming back home after a great trip is not too difficult:

  1. Always stay hydrated – This is very important. Always have a reusable water bottle in your bag and refill it whenever possible. You never know how your day is going to go and overall your body will thank you!
  2. Have healthy non-perishable snacks on hand – Similar to always having water on hand, having snacks that don’t need to be refrigerated like granola bars, nuts, and dried fruit means that you won’t have to eat any processed food (like at the airport) if you don’t want to. Honestly, from security to the gate at the airport we pass several overpriced fast food restaurants. Bringing snacks helps me save money and save the unhealthy eating for the actual trip. I am a tea junkie too – so I always have a few bags of my favorite tea in my bag to sip on when I get to the hotel.
  3. Buy travel sized versions of your go-to beauty products – When I was a teen I would go on trips and rely on the hotel amenities and it would reek havoc on my skin. Now that I know better, I either buy travel sized versions of my favorite products or fill up a TSA approved container before I hit the road. I always bring my own facial cleanser, mask, toner, lotion, body wash, hair moisturizer, and body oil. This usually covers it for me but everyone should adjust as needed.
  4. Try to exercise in your hotel room – While doing 2 hour workouts at 6 am on vacation is a little much for me, I like to pack gliders and arm/ankle bands in my bag so I can ensure I get some movement in. I love to bring these items on trips because they are light weight and don’t require much space to use. If you are going on a more leisurely vacation, I recommend at least 30 mins of exercise. If you are doing more physical activity during the day, only stretching or doing yoga is great.
  5. Pack your vitamins – This will have you feeling your best while you are on vacation and after you get back. I usually carry my women’s multivitamin and some Vital Proteins Collagen Powder packets to mix in my hot beverages.
  6. Bring wet wipes and hand sanitizer – Since we come in contact with different surfaces all the time, having these handy is helpful when a public restroom is not available. Keep your wet wipes and hand sanitizer in your bag to clean your hands before eating any street food or when you sit down to have lunch at a local spot. This will keep germs at bay so you don’t get sick on or after your trip.
  7. Get sleep – My rule is try to get a full night of sleep the day/night before your flight to and from your vacation. If you are taking a red eye, try to be as relaxed as possible so you actually sleep on the plane. It is not fun spending the first few days of your vacation exhausted so this helps tremendously in my experience.

Required: Let loose and have fun! – Staying healthy is ideal, but vacations are supposed to be a time to laugh and create new memories. Don’t worry too much about keeping up with your established routine and enjoy the moment!

Standard
Fitness

My P.volve Review

Picture by @awellthygirl. P.ball, P.band, P.mat and the light ankle weights are displayed in the photo.

I first learned about P.volve when I was scrolling through Instagram during the 2018 holiday season. The minimal aesthetic of the ads caught my eye, but Stephen Pasterino (a.k.a. P)’s explanation of his unique program is what drew me in. I decided to follow the official P.volve Instagram account to do more research on the program. The account features testimonials, previews and more. After having a rough December fitness and diet-wise, on December 30th 2018, I finally decided to test out the 14-day trial and I was hooked!

P.volve is a low-­impact fitness method that blends physical therapy, functional science and hip-­opening movements to sculpt hard-­to-target areas with ease. It reminds me a lot of pilates, barre and yoga but with a different twist. I personally steam the workouts using the app on my tablet but there are a few studios in select cities. The supposed results: you tone and lengthen your body by doing natural movements you would do in your everyday life (with the help of their unique equipment).

After about 9 months doing the program I can say that P.volve is different from other methods that I have tried and works well for me for two main reasons:

  1. It changes the muscle tone and shape of my body while not contributing too much to weight loss.
  2. It’s a low impact program that is easy on the joints.

Here’s some background—While I am a petite woman that has always been on the smaller side, any changes in my diet and exercise routine are very noticeable and it was hard to find a good balance in the past. For example, I would do HIIT, weight lifting and a lot of squats and noticed that my legs were getting too bulky for my liking. Then I would shy away from working out and lose my progress. This cycle would continue on because I wanted to maintain my glutes but not gain any more mass on my legs or arms. I also have scoliosis, which can cause aches and pain during exercises like crunches and sit ups. Basically I wanted to have my cake and eat it too– there were some parts of my physique that needed fine tuning and others that did not.

P.volve solved both of these personal issues overtime. It has helped me lean out my legs and arms, which is amazing for someone as short as me (5’0″). Also, I am finally seeing definition in my core which I struggled with because of my scoliosis. Most importantly, I got to keep my butt (lol).

I want to note that P.volve is not a weight loss program on its own. If weight loss is one of your goals too, it is best in my opinion to lose weight with another method then switch to P.volve to help fine tune your overall appearance.

Utimately, I think anyone that has similar goals to mine should definitely give P.volve a go. Not only is there a 14-day trial, there are also so many workout options. There are varying levels or difficultly and you can workout with or without equipment. The beginner programs usually give new users a little leeway– they either require easy to find equipment like gliders and ankle bands or no equipment or at all. In my experience, to get the most out of the program you should buy at least the P.ball and the P.band. Personally I see myself sticking to this program for a while. Overtime I will share my progress and photos to give you guys a more in-depth look.

If you like what you have read so far, click here to check out P.volve!

Standard
Healthy Recipes

Healthy-ish Banana Bread Recipe

With its super-moist texture, sweet banana and brown sugar flavors, the incredibly softly crumbed banana bread (and muffins too) is one of my favorite treats to eat. Unfortunately, while banana bread is good for my taste buds, it is not practical to consume it too frequently. Since I began eating a little more mindfully I have been making a healthier version of banana bread. Here is what you need:

  • 2 over ripe bananas – make sure they have the brown spots on them
  • 2 organic eggs
  • 1 cup of almond flour
  • 1/4 cup of coconut flour
  • 2 tbsp of maple syrup
  • 2 tbsp of soft coconut oil
  • 2 tsp of vanilla extract
  • 1 tsp of baking soda
  • 1/2 tsp cinnamon

Directions:

  1. Preheat your oven to 350 degrees and line a 9 inch bread loaf pan with parchment paper and spray/rub any exposed sides with coconut oil.
  2. Mash the overripe bananas until
  3. Add the rest of the wet ingredients to the bananas– the maple syrup, coconut oil, eggs and vanilla. Mix until they are thoroughly combined
  4. In a separate bowl, mix all of the dry ingredients. Be sure to remove any clumps from the almond of coconut flour.
  5. Add the dry ingredients to the wet until the dough become thick and even.
  6. Place the dough in the pan and smooth out the top with a spatula.
  7. Bake for 30 mins and check if a knife/cake tester comes out clean.
  8. Enjoy!

This easy treat is good by itself or great with a nut butter and fruit. What is your favorite traditional (non-healthy) dessert? Have you found any healthier alternatives for it? Let me know in the comments!

Standard
Healthy Recipes

My Go-to Smoothies

I am obsessed with smoothies and have been for the last few years – especially when I think back to my busy college days. They are easy to whip up, you can sneak vegetables inside without altering the flavor, and they are so satisfying for any sweet tooth. Typically the base of my smoothie is just water, bananas and a leafy green. From there I incorporate a protein powder, vitamins and sometimes a bit of fat from avocado or peanut butter. I usually switch between a chocolate and a green smoothie to keep things interesting, but there are other recipes I try out sometimes too.

So here are 2 smoothies I usually make:

Green Goddess Smoothie

  • 1 cup of water
  • 1/2 banana
  • 1 cup of spinach/kale
  • 1/4 cup of mango
  • 2 scoops of Vital Proteins Collagen Powder
  • 1 scoop of Amazing Grass Green Super Food
  • 1 tbs of chia seeds
  • optional: 1/2 avocado

Chocolate Smoothie

  • 1 cup of water
  • 1 banana
  • 1 cup of spinach
  • 1 tbs of cacao powder
  • 2 scoops of Vital Proteins Collagen Powder
  • 1 scoop of Amazing Grass Green Superfood
  • 1 tbs of chia seeds
  • Either: 1/4 cup of blueberries or 1 tbs of peanut butter

And there you have it! Two smoothies that can be made in advance of right before you run out the door for work. Let me know if you have you own go to recipes that you can’t be without.

Standard
Fitness, Lifestyle

Summer Work Week Morning Routine

Mornings are especially important for our well-being. How you spend the first few waking hours can determine your experience for the rest of your day. I like to start my day with a combination of healthy eating, exercise and some positive vibes but my routine does change season to season. Here’s what I do in the summer:

+ 6:20 am: I wake up and check messages and social media. Since I don’t look at my phone before bed, I like to take 5 mins to put any messages I may have missed when I was asleep in my radar for later in the day.

6:25-6:40 am: I usually drink a cup of green tea or a matcha latte before eating anything. I usually have a pre-made smoothie or cold overnight oats on hand that I eat after having my tea. I make sure to incorporate my collagen and super green powder into my breakfast and take my vitamins. Also, by this point I set an intention for the day to start things off on a positive note.

6:40-7:20 am: After eating something I do a quick P.volve workout that is usually 20-40 mins long. These workouts are low impact and easy to do when I am short on time. These workouts have I have been doing P.volve for 9 months and doing this in the mornings has made all the difference in my energy level for the rest of the day.

7:20-8:15 am: Shower time! I usually hop into the shower before or by 7:30. In fact, my actual alarm is set for 7:30 because that is the latest time I need to be in the bathroom to be on time for work. After about 20 mins in the bathroom, I do my day time skin care routine, fill in my eyebrows and get dressed. I usually just pull my hair back into a bun and I am go to go.

8:15 am: Hustle out the door and head to work!


Standard
Lifestyle

How I Eat Out on the Weekends

It’s finally the weekend and I have maybe two meals that I prepped before hand left, only a few ingredients in my fridge, & a few social obligations that involve food to attend. With all of this going on it is very easy to fall of track when it comes to healthy eating, especially when you are out and about and your options are not the healthiest. Here are a few tips I have used over the years that allow me to mindfully indulge:

  1. Drink Water – This sounds like a no brainer, but we often forget how much sugar and processed ingredients are in mixed drinks, juices and sodas. Not only does asking for water only cut out sugar and necessary calories, drinking water keeps you satisfied while eating. I opt to drink water before my meal (it usually shows up first anyway) because it keeps me fuller and I don’t overeat.
  2. Don’t Go to Dinner Starving – I have personally made the mistake of going out hungry many times and the result is the same, I eat way more than anticipated and feel over stuffed by the end of the meal. In my experience, having a small snack 1 hour before eating out makes all of the difference.
  3. Ask For Sauces on the Side – This way I can control how much I use – this especially applies to creamy sauces that are very heavy.
  4. Use the Smaller Sized Plate at Buffet Style Restaurants – Typically I avoid these types of places all together if I can, but family style events usually have a buffet style set up. When people go to buffets they usually add a lot of food to a large plate and they go through all the choices that are being offered. I am a try a bit of everything kind of girl, so getting a smaller plate means I get to try everything but I don’t get too much.
  5. Take Your Time – Eating slowly comes naturally to me (anyone who personally knows me can vouch for this), but I find that rushing while you eat doesn’t give the body enough time to let you know that it is full.
  6. Share Desserts – Sharing is caring! This cuts down on how much you eat, but you still get to nibble on a decadent treat.

And there you have it, 6 ways to eat more mindfully without being too restrictive. This what I did when I first started out and it has worked for me to this day. I hope this is helpful for anyone that finds they need some guidance when they are not in total control of the food that is in front of them.

Standard
Healthy Recipes

15 Minute Cauliflower Gnocchi Dinner

Picture by @awellthygirl

Even if you are only vaguely interested in the wellness world you have definitely seen Trader Joe’s Cauliflower Gnocchi somewhere on Instagram. This version of gnocchi is popular be cause not only is it made of cauliflower and potatoes instead of potatoes and flour like the traditional gnocchi, it tastes delicious. When I go for a Trader Joe’s run I make sure to grab a packet or two to make a quick and healthy dinner that is done in 15 mins. This version is made with vegan pesto, but you can use any sauce you like. Here’s what you need:

  • 1 packet of Trader Joe’s Cauliflower Gnocchi
  • 1 package of Trader Joe’s Vegan Kale Pesto
  • a pinch of salt (optional)
  • garlic powder to your personal taste (optional)
  • 6 cherry or grape tomatoes

Here is how to make the Pesto Gnocchi:

  1. Warm up a non-stick pan using a medium-high level of heat
  2. Add in the gnocchi straight from the bag- it tastes better in my opinion when you don’t thaw it out.
  3. Add some salt and garlic to add flavor (optional)
  4. Cook for about 7-10 mins until the pieces are no longer frozen and have a slight golden tint.
  5. Remove from the pan and add pesto to the gnocchi
  6. Halve the tomatoes and saute them for 3-5 mins.
  7. Add the tomatoes to the gnocchi and enjoy!
Standard
Healthy Recipes

Gluten-Free Chocolate Chip Cookie Recipe

Chocolate chip cookies are a go-to dessert that you can’t escape whether you are at a child’s birthday party or attending a lunch for a work event. Although tasty they are not the best thing to grab regularly. I have been testing out different ways to make a healthier version, and after some trial and error I have a recipe that is vegetarian, gluten free and doesn’t have a sandy texture. Here are the ingredients that you need:

  • 2 tablespoons of coconut oil (soft but not completely melted)
  • 3 tablespoons of maple syrup
  • 1 teaspoon of vanilla extract
  • 1 egg
  • 1 cup of almond flour
  • 1 cup of almond meal
  • 1/2 teaspoon of baking powder
  • 1/4 teaspoon of fine sea salt
  • 1/2 cup of chocolate chips

Directions:

  1. Preheat the oven to 375 degrees
  2. Mix coconut oil and maple syrup first with a whisk until smooth. Add egg and vanilla and stir until smooth
  3. In a separate bowl mix the flour/meal with the baking powder and salt.
  4. Add dry ingredients to the wet and mix with a wooden spoon.
  5. Add in chocolate chips and mix well
  6. Scoop out a tbsp of dough for each cookie- keep cookies 2 inches apart on a parchment paper lined tray.
  7. Pop into the oven for 8-9 mins. Cookies should have golden brown edges. 
  8. When done – let cool for 15-20 mins before enjoying!

This will make about 15- 16 cookies. I hope that you all try this out and let me know how you like them. The suggested serving size is two cookies–but lets me honest here, these are so good they will be gone in a flash!

Standard